Restake New Validator Native Beacon Chain ETH
The steps below are only required for new validator native beacon chain ETH. Any validator native beacon chain ETH that was restaked prior to the PEPE release will not need to repeat these steps.
Running your own EigenPod for native restaking is an advanced task that requires operating and maintaining Ethereum validator infrastructure. It involves managing validator keys and associated risks including slashing, downtime penalties, or loss of access to restaked funds if keys are lost or compromised. For more information, refer to Ethereum Launchpad.
Prerequisites
The user will need an environment available to run the EigenPod Proof Gen CLI including its software prerequisites.
Part 1: Create EigenPod
Invoke EigenPodManager.createPod().
Part 2: Configure Validator(s) Withdrawal Credentials
-
Configure the validator(s) credentials to point to the EigenPod address when the validator is created. Please see Ethereum Launchpad for more information. a. Optional: you may choose to set the FEE_RECIPIENT to your EigenPod address if you wish to Restake those fees.
-
Wait for the validator(s) to become active on-chain. Please see https://beaconcha.in/ to follow your validator status.
-
Run the
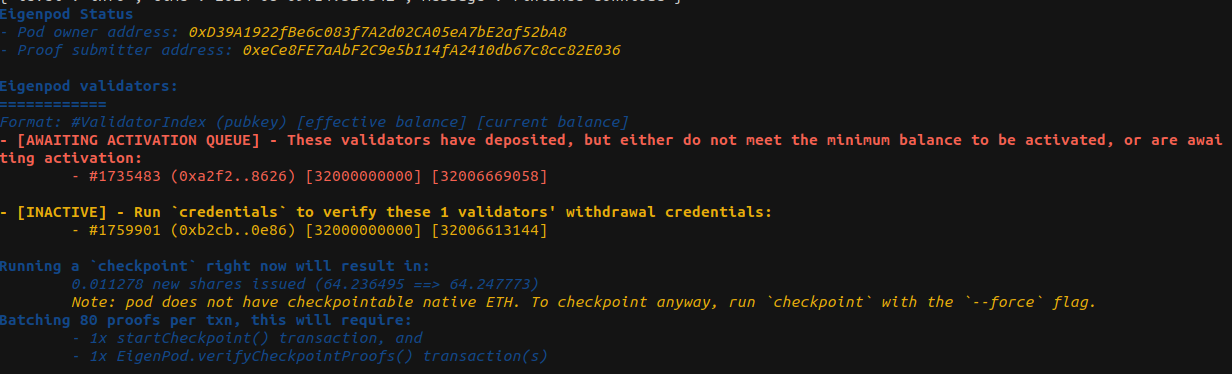
statuscommand via the EigenPod Proofs Generation CLI. The command will confirm the withdrawal address is set correctly and the validator is active on the beacon chain.
Part 3: Link the Validator to the EigenPod via Proof Generation
-
Run the
credentialscommand via the EigenPod Proofs Generation CLI. -
Invoke the
credentialscommand with the--sender $EIGENPOD_OWNER_PKargument so that CLI will submit proofs and act on-chain for you. This is the private key of the wallet that was used to create the EigenPod. Example here:
./cli credentials --execNode $NODE_ETH --beaconNode $NODE_BEACON --podAddress $EIGENPOD_ADDRESS --sender $EIGENPOD_OWNER_PK
-
Invoke the
statuscommand to confirm restaked shares increased by the anticipated amount. -
Your validator ETH balance is now Restaked.